Data Cleanup / Goals
Review Entries
The Review Entries table shows all of the entries in the selected project.
Columns
The columns are: Edit (no header), Vernacular, Number of Senses (#), Glosses, Domains, Pronunciations
(![]() ), Note, Flag
(
), Note, Flag
(![]() ), and Delete (no header).
), and Delete (no header).

To show/hide columns or rearrange their order, click on the
![]() icon in the top corner.
icon in the top corner.
Due to the nature of Rapid Word Collection, Data Entry in The Combine does not support the addition of definitions or parts of speech. However, if the project has imported data in which definitions or parts of speech were already present, additional columns will be available in the Review Entries table.
Sorting and Filtering
There are icons at the top of each column to
![]() filter and
filter and
![]() sort the data.
sort the data.
In a column with predominantly text content (Vernacular, Glosses, Note, or Flag), you can sort alphabetically or filter with a text search. By default, the text search is a fuzzy match: it is not case sensitive and it allows for one or two typos. If you want exact text matches, use quotes around your filter. To show all entries with non-empty text in the column, type a space for your filter.
In the Number of Senses column or Pronunciations column, you can sort or filter by the number of senses or recordings that entries have. In the Pronunciations column, you can also filter by speaker name.
In the Domains column, sorting is numerical by each entry's least domain id. To filter by domain, type a domain id with or without periods. For example, "8111" and "8.1.1.1" both show all entries with a sense in domain 8.1.1.1. To also include subdomains, add a final period to your filter. For example, "8111." includes domains "8.1.1.1", "8.1.1.1.1", and "8.1.1.1.2". Filter with just a period (".") to show all entries with any semantic domain.
Editing Entry Rows
You can record, play, or delete an entry's audio recordings by using the icons in the Pronunciations
(![]() ) column.
) column.
To edit any other part of an entry, click the ![]() edit icon in the initial column.
edit icon in the initial column.
You can delete an entire entry by clicking the
![]() delete icon in the final column.
delete icon in the final column.
Merge Duplicates
This tool automatically finds sets of potential duplicate entries (up to 5 entries in each set, and up to 12 sets in each pass). First it presents sets of words with identical vernacular forms. Then it presents sets with similar vernacular forms or identical glosses (or definitions).
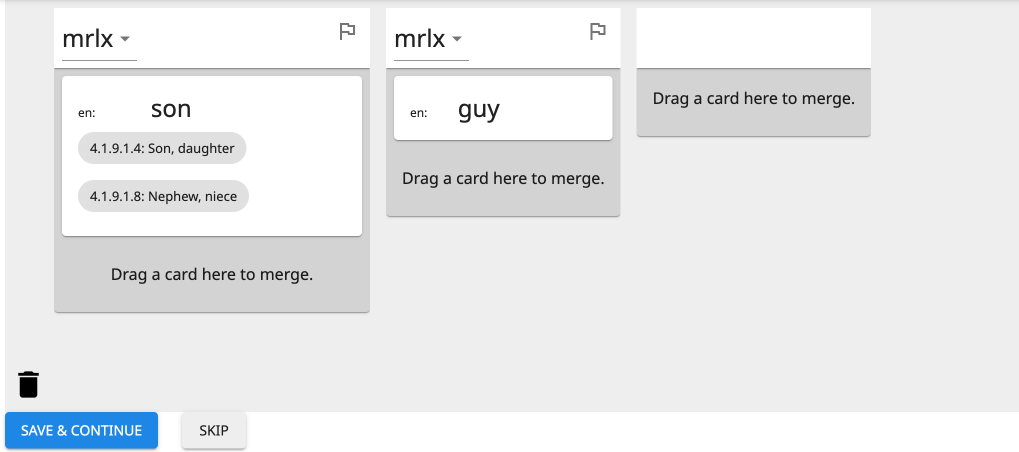
Each entry is displayed in one column, and each sense of that entry is displayed as a card that you can click-and-drag. There are three basic things you can do with a sense: move it, merge it with another sense, or delete it.
Move a Sense
When you click-and-hold a sense card, it turns green. You can drag-and-drop the sense card to a different place in the same column to reorder the senses of that entry. Or you can drag-and-drop the sense card to a different column to move the sense into that other entry.
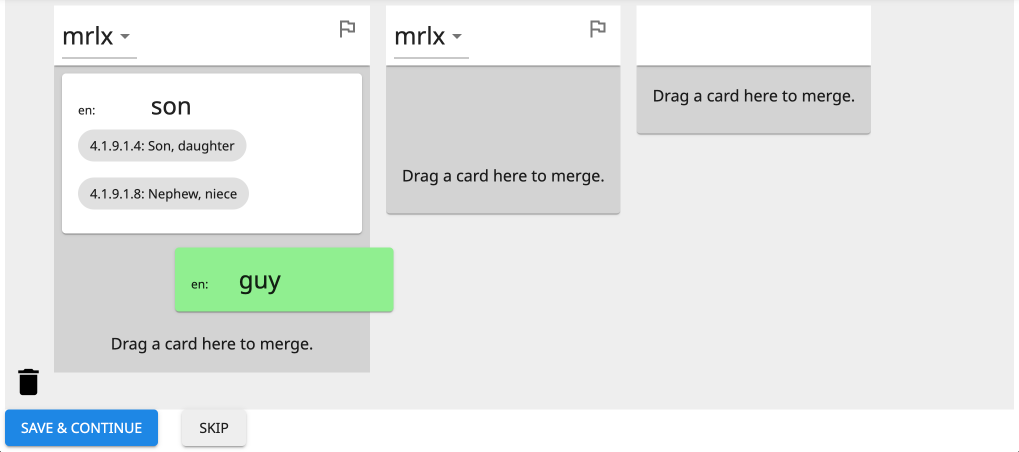
If you want to split an entry with multiple senses into multiple entries, you can drag one of the sense cards into the empty extra column on the right.
Merge a Sense
If you drag a sense card over another sense card, the other sense card also turns green.
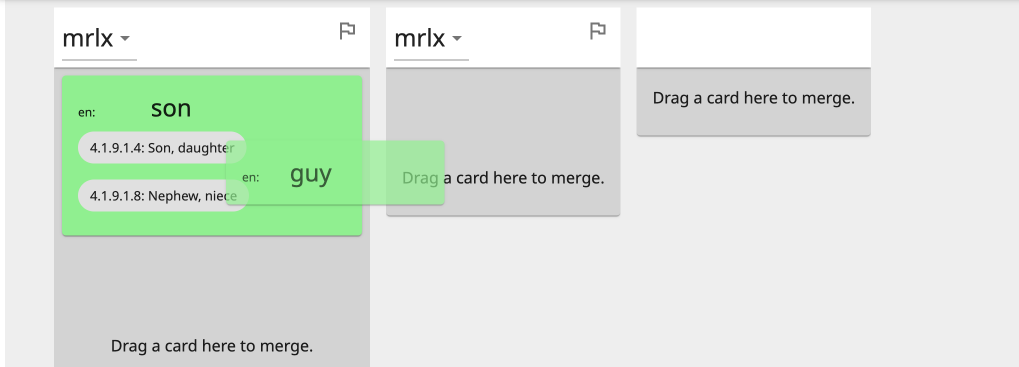
Dropping a sense card onto another sense card (when they are both green) merges the senses. This causes a blue sidebar to appear on the right, showing which senses are being merged.
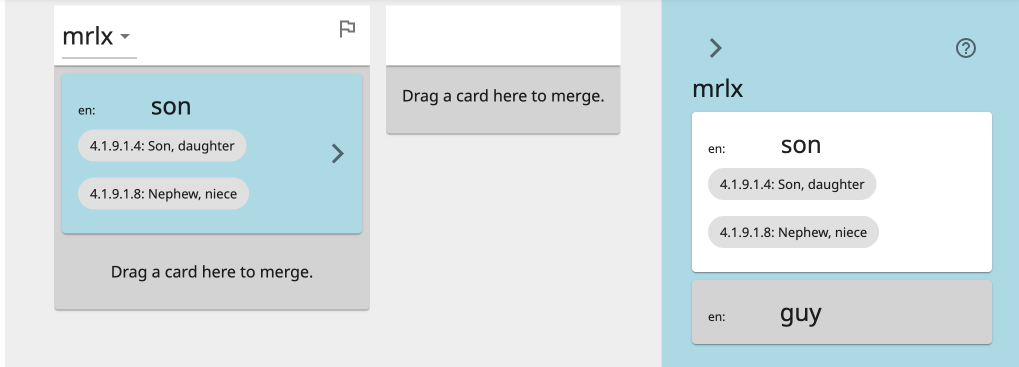
You can drag-and-drop sense cards to or from the sidebar to change which senses are being merged. Or within the sidebar, you can move a different sense to the top (to preserve its glosses).
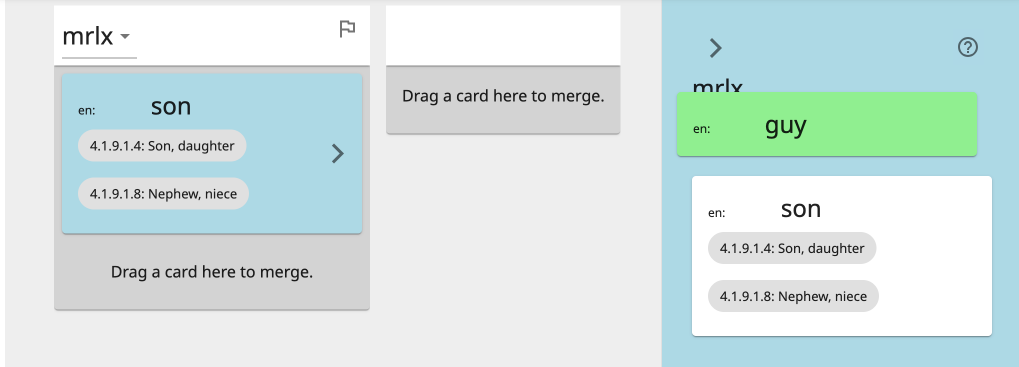
Click on the right angle bracket (>) to close or open the blue sidebar.
Delete a Sense
To delete a sense entirely, drag its card to the garbage can icon in the lower-left corner. When the sense card turns red, release it.
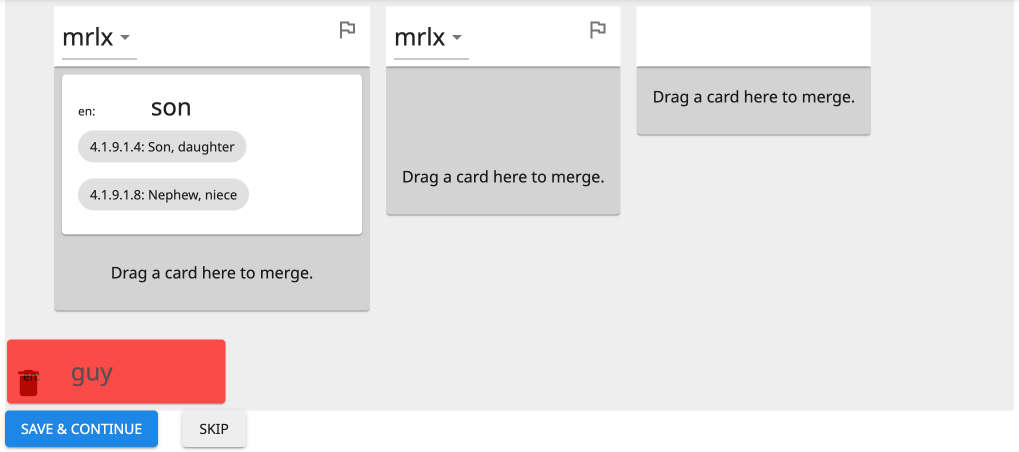
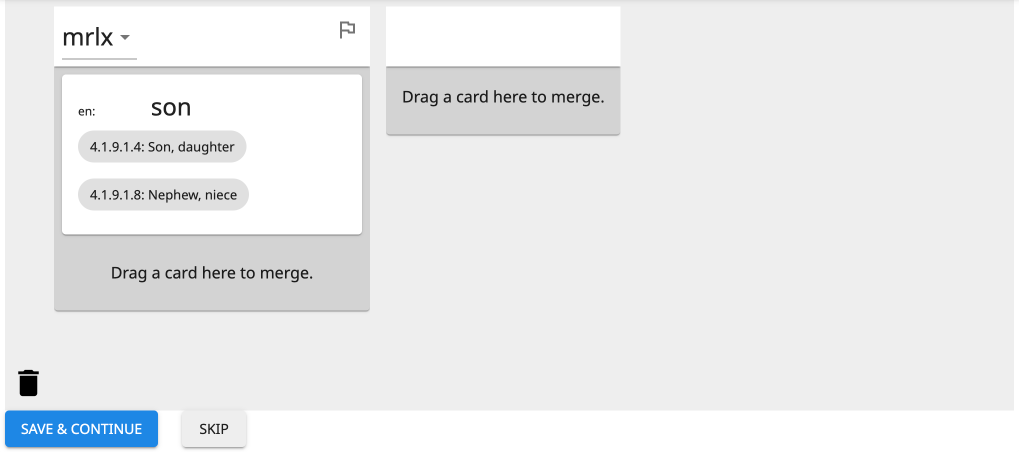
If you delete the only remaining sense of a column, the whole column will disappear, and that entire entry will be deleted when you Save & Continue.
Flag an Entry
There is a flag icon at the top-right corner of every column (to the right of the vernacular form).

You can click on the flag icon to flag the entry for future inspection or editing. (You can sort flagged entries in Review Entries.) When you flag an entry, you are given the option to add text to the flag.
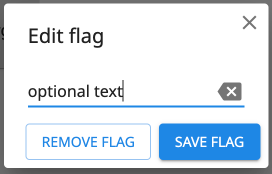
Whether or not any text is typed, you will know that the entry is flagged because the flag icon will be solid red. If you added text, you can hover your cursor over the flag to see the text.

Click on the red flag icon to edit the text or remove the flag.
Finishing a Set
There are two buttons at the bottom for wrapping up work on the current set of potential duplicates and moving on to the next set: "Save & Continue" and "Defer".
Save & Continue

The blue "Save & Continue" button does two things. First, it saves all changes made (i.e., all moved, merged, or deleted senses), updating the words in the database. Second, it saves the resulting set of words as non-duplicates.
Tip
Are the potential duplicates not duplicates? Just click Save & Continue to tell The Combine not to show you that set again.
Note
If one of the words in an intentionally unmerged set is edited (e.g., in Review Entries), then the set may appear again as potential duplicates.
Important
Avoid having multiple users merge duplicates in the same project at the same time. If different users simultaneously merge the same set of duplicates, it will results in the creation of new duplicates (even if the users are making the same merge decisions).
Defer

The grey "Defer" button resets any changes made to the set of potential duplicates. The deferred set can be re-visited via Review Deferred Duplicates.
Merging with Imported Data
Definitions and Part of Speech
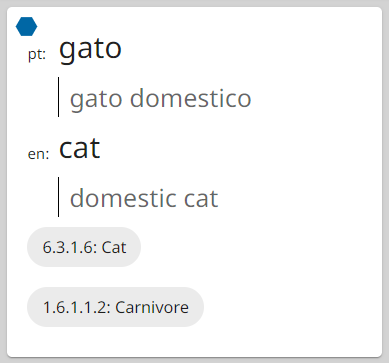
Although definitions and part of speech cannot be added during Data Entry, they can be present on imported entries. This information will appear in the Merge Duplicate sense cards as follows:
- Any definition in an analysis language is shown below the gloss in that language.
- Any part of speech is indicated by a colored hexagon in the upper-left corner. The color corresponds to its general category (e.g., noun or verb). Hover your cursor over the hexagon to see the specific grammatical category (e.g., proper noun or transitive verb).
Note
A sense can only have one part of speech. If two senses are merged that have different parts of speech in the same general category, the parts of speech will be combined, separated by a semicolon (;). However, if they have different general categories, only the first one is preserved.
Protected Entries and Senses
If an imported entry or sense contains data not supported in The Combine (e.g., etymologies or sense reversals), it is protected to prevent its deletion. If a sense is protected, its card will have a yellow background—it cannot be deleted or dropped into (i.e., merged into) another sense card. If an entire entry is protected, its column will have a yellow header (where the vernacular and flag are located). When a protected entry has only one sense, that sense card cannot be moved.
Check Orthography
This tool is only available to project admins.
Check Orthography provides an overview of every unicode character that appears in the vernacular forms of the project's entries. This allows you to identify which characters are commonly used in the language, and to "accept" them as part of the language's character inventory. The character inventory is part of the LDML file for a project's vernacular language that is included when the project is exported. Accepting characters will lead to accurate representation of the language in Unicode, the Ethnologue, and other language standards and resources.
Another use of Check Orthography is to identify and replace characters that have incorrectly been used in typing vernacular forms of words.
There is a tile for each unicode character that appears in the vernacular form of any entry. Each tile shows the character, its Unicode "U+" value, the number of times it occurs in entry vernacular forms, and its designation (default: Undecided).

Manage a Single Character
Click on a character tile to open a panel for that character.
Tip
You may have to scroll to see the panel. If your window is wide enough, there will be a blank margin on the right; the panel will be at the top of this. If your window is narrow, tiles fill all the way to the right side of the window; the panel will be at the bottom, below all the tiles.
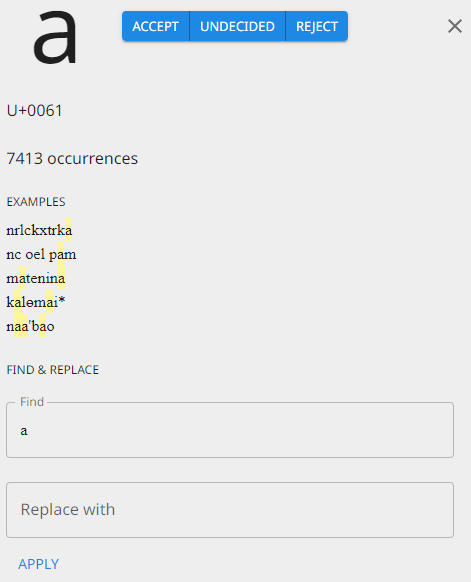
The middle of the panel shows up to 5 example vernacular forms in which the character occurs, highlighting the character in each occurrence.
At the top of the panel are three buttons for designating whether the character should be included in the vernacular language's character inventory: "Accept", "Undecided", and "Reject". Pressing any of these buttons will update the designation at the bottom of the character tile. (These updates to the character inventory are not saved to the project until you click the Save button at the bottom of the page.)
At the bottom of the panel is a Find-and-Replace tool. If every occurrence of the character should be replaced with something else, type the replacement character or string in the "Replace with" box and click the Apply button.
Important
The find-and-replace operation makes changes to entries, not to the character inventory.